Anim Ch 17: From Mediocrity to Tutorials
⬅️Check out the last Ch
The Rendering Struggle
Reaction difusion is cool no matter what.
Faced some probs with rendering, hence the short clip. Welcome to the world of 3D, where your computer decides your creative limits.
JeanBoi
Trying to bombard me with C4D tutorials. Results = mediocre in 2019.
There is not enough pressure. In the wise words of Bane, "victory has defeated you!"
Desert Dreams
Still dreaming of deserts.

Low Skill Electricity
Keeping up to date with my skills. It's easy because my skills are low. Creating electricity without any fancy plugins in C4D.
The Crisis of Creation
"The real crisis is not that we do not have anything good or the coming generation is bad, the real crisis is that we cannot come up with anything better." - some internet article
It was only fitting for this post that I don't remember who said it.
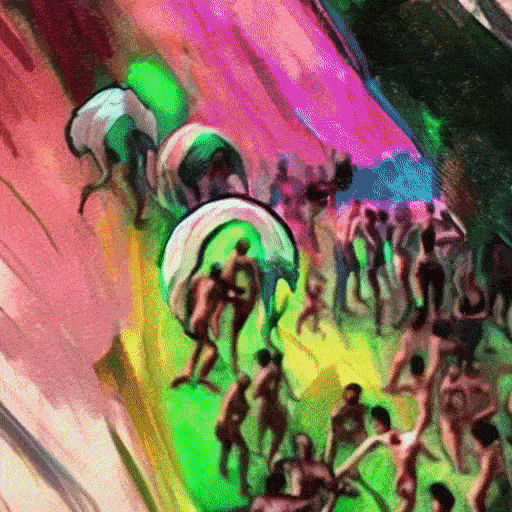
Social Media Inspirations
This post is inspired by the endless sea of posts I go through every day on social media. Normally I do not remember the source of my inspiration but this time I do.
This post of mine is inspired by work of Ryan Carlston - https://www.instagram.com/p/CFFS-4ahfRC/?utm_source=ig_web_copy_link
After seeing the repetition in his post, it was clear to me that this could be better explored by programming. So these are my experiments. First simply programmed what he did and then animated it. Then mapped the animation on a 3D surface to add SWAG, lol.


Below is the screengrab of the original video that was mapped.
Glass Animals Reference
Can you guess the song? It's by Glass animals. I think it is important for us to remember our references, you don't always have to share them, but one must know. Though I'm saying it, I carelessly forget to keep track of my own references. Hopefully going further I will be able to share my references here.
I'm sharing the Glass Animals album here, enjoy.
Glass Animals · Dreamland
Jewels in Gold Rings

This is an animation of jewels getting stuck in gold rings.


https://www.youtube.com/watch?v=MgX7BlGmf4M&ab_channel=eyedesyn
The Tutorial Saga
This is probably the last time I will try to make a tutorial.
Tutorial of the day. Take one.
V1
V2
V3- The Hoarder
The idea was 'Hoarder' with this effect I was going to add several objects and animate it. I even created the setup, while adding random objects from the internet it crashed. Most rookie mistake of not saving it. So that's trash.
V4 Candy
While making the above sketch, I realized that all my materials look like candy. So I went ahead and made V4 based on candy. Guess what? And that does not look like candy.
One can totally conclude that I did not like the results, but if you can come up with better applications or sketches I have shared the process below.
This is my attempt to teach while I learn. You can follow the process here, or follow my instructions below:
- Check fps in the render setting and project setting and match it
- To create a looping animation create the time slider of the specific length (num of sec * fps)
- Create spline
- Create tube
- Mograph --> cloner (later change iterate to random, to randomize the objects)
- Create new materials, create new copies of the tubes = num of materials (all under the parent cloner), add the material to each tube
- Create deformer --> spline wrap, specify the desired spline in the object property of the spline wrap. Group the cloner (alt+g), rename the null. Place the spline wrap between the null and cloner (in the hierarchy). Adjust the axis (object tab) of the spline wrap
- Select all points of the spline, right-click, and select chamfer. Adjust the chamfer settings to smoothen the spline. Increase the height segments to smoothen the geometry
- Use the script written by https://aturtur.com/pile-up-effector/ - copy the pile-up effector object in your file. Drag the effect in the effector tab of the cloner
- You can adjust the axis and gap in the pile script
Animation
- Mograph --> effector --> shader
- Drag the shader in the effector tab of the cloner above the Pile-up script to maintain size hierarchy
- In the shader --> parameter tab - uncheck uniform scale, and adjust the scaling according to need
- Then in the shading tab, select noise from the shading dropdown menu. Go inside the noise. Adjust setting according to need. Ensure the loop period is the same as the length of the animation
- Stage and light it like you would light your soul